WHAT IS A V-ANVIL MICROMETER?
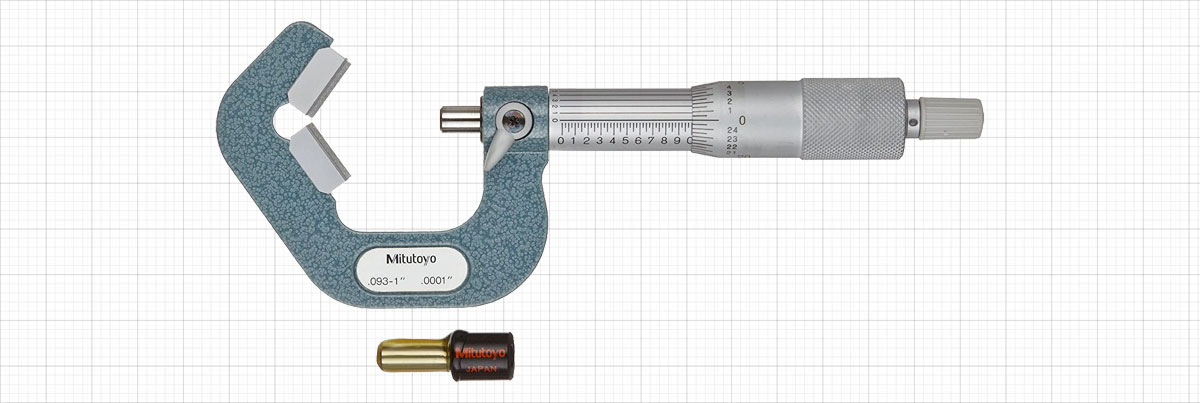
We have certainly discussed anvil micrometers on the Higher Precision blog. But what about the slightly more obscure v-anvil micrometer? Well, it is time for the v-anvil micrometer to get a bit of the spotlight. This specialty tool provides precision in measurements when other tools just will not suffice. But we will get into that in a bit. First we would like to introduce you to the general design of the v-anvil micrometer so you can understand what we are referring to throughout.
THE DESIGN OF V-ANVIL MICROMETER
The v-anvil micrometer is similar in overall structure to the standard micrometer. The main parts include the ratchet, knurled gripe, thimble, sleeve, lock nut, c frame, spindle, and anvil. The difference that sets the v-anvil apart is the shape of the anvil itself, which is shaped like the letter “V” laying on its side. The v of the v-anvil itself comes with more widely distanced or close together tips, and the point where the two lines of the “V” connect can be touching and fused or may have a small gap between them. Finally, the end of the spindle may be flat across or be conical in structure with varying degrees of a point at the tip. All of these minor adjustments in design provide greater levels of precision based upon what it is you are using the v-anvil micrometer to measure. V-anvil micrometers also come with a ratchet stop in order to apply a more constant force and can be made with a centerline groove that provides further specialization of measurement. Finally, v-anvil micrometers come in both digital and Vernier styles. Benefits of using a digital v-anvil micrometer include having a precise zero-setting, data hold for ongoing measurements, a 2-point preset for more efficient use, a function lock to lock the position in place, clearer data output, and conversion capabilities between inches and millimeters.
USES FOR THE V-ANVIL MICROMETER
The v-anvil micrometer has two common uses. These include measuring the outside diameter of cutting tools that are built with an odd number of flutes and checking a part for roundness. We will describe both of these applications in more detail.
MEASURING THE OUTSIDE DIAMETER OF CUTTING TOOLS
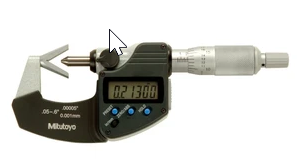 When taking a measurement of outside diameter from a cutting tool with an odd number of flutes, it is difficult to use a standard micrometer or caliper given the uneven placement of the part surfaces used for measurement. This is where the v-anvil micrometer is particularly useful. Given the placement of the v-shaped sides of the anvil, a cutting tool with an odd number of flutes can be measured easily. Simply lay the cutting tool on its side perpendicular to the v-anvil micrometer anvil, align the lanes of the flutes up with the anvil surface and spin the ratchet to adjust the spindle into place. The v-anvil micrometer is ideal when measuring cutting tools such as taps, reamers, and end mills. Additionally, v-anvil micrometers are useful for measuring the pitch diameter of a tap that has a small diameter. This can be accomplished by the single-wire method. One important factor to keep in mind when measuring tools with odd numbers of flutes is that the number of flutes will determine the specific design of v-anvil micrometer that is required. For example, when inspecting a tool with 5 flutes you will need a different v-anvil micrometer than when inspecting a tool with 3 flutes.
CHECKING FOR ROUNDNESS
Another use for the v-anvil micrometer is to check for roundness of a part, also known as checking for out-of-roundness. The way in which this is done is to first take several measurements at different locations around the outside of the part cylinder or shaft. Then, you subtract the smallest diameter from the largest diameter. Finally, you divide the resulting number by two. The outcome represents the amount of out-of-roundness that the part exhibits. Checking for roundness is made easier by the v-anvil micrometer because of the location the sides of the v-shaped anvil are well-positioned to place a part horizontally and have contact points be around the edge.
BENEFITS OF THE V-ANVIL MICROMETER
The v-anvil micrometer increases measurement precision when collecting data on diameter because of the way in which the measurement is collected. Each diameter measurement is taken with contact made at three points (each side of the anvil “V” and the spindle). Having three points of contact is in contrast to the normal two points of contact available when using a standard micrometer or caliper. In fact, when working with cutting tools that have an odd number of flutes, the v-anvil micrometer remains the only device capable of taking a highly precise measurement.
TECHNICAL DATA FOR V-ANVIL MICROMETERS
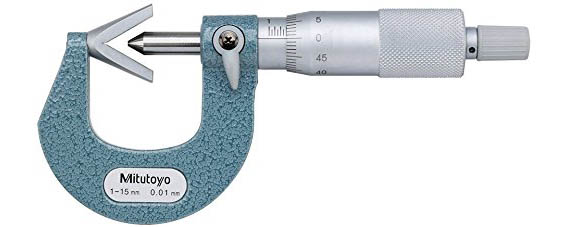
Having some basic technical data regarding the design of v-anvil micrometers is helpful for those hoping to understand the details of application. V-anvil micrometers are available with or without a centerline groove. Having a centerline groove can be helpful when taking the measurement of pitch diameters on taps that have three or five flutes. The zero reading of the v-anvil micrometer always starts from the point where the two sides of the “V” meet. Often, the v-anvil micrometer will come pre-equipped with a cylindrical zero set check. On analog models, graduation is 0.01mm, .001mm, or .0001mm and flatness of the spindle and anvil is 0.6µm[.000024”] /1.3µm[.00005”]. On digital models, flatness of the spindle and anvil is 0.3µm[.000012”] /1µm[.00004] and the battery life can be expected to last 1-2 years with normal usage. The resolution of the digital models is typically 0.001mm or .00005″/0.001mm. Functionally, a digital v-anvil micrometer has a zero-setting, data hold, function lock, data output, 2-point pre-set, and conversion capabilities.
CONCLUSION
V-anvil micrometers are just the tools you need for very specific precision measurement tasks. When working with an odd number of flutes on a cutting tool or checking for out-of-roundness, these tools will provide the measurements you require with ease. While they may not be as versatile as the standard micrometer or caliper, v-anvil micrometers are a requirement for any metrologist tool set.
Source: higherprecision.com


